
Starting a new group on Reunacy is super easy – but to get the most out of the platform and get your people excited to jump on board, we’ve put together a quick set of insider tips:
The Big Idea: Build your group carefully at the beginning to give it a solid foundation. This will make it way more appealing to new invitees as you grow.
Here’s a step-by-step guide.
4 Easy Steps To Build An Awesome, Engaged Group
1) Before You Start:
Have the following info handy:
- Your Headshot and a Short Bio: This sets a great example as the leader of the group!
- Create your “Core 4”: Come up with a list of four people who will get on board and be willing to create full profiles. Make sure you have their current email addresses.
- Group Name and Description: Write up a short and interesting blurb about the group. You can use the subtitle field to help differentiate your group from others (your group name might be your school name, e.g. “Lakeview High” & your subtitle can be your class year, e.g. “Class of 1990”).
- Some fun photos: Get a few fun photos for the group that you can use in the header of the page and in the group description.
- Extras: If you have ideas for Custom Questions, Video Prompts, and Event Information, even better! You can add those now or wait until later.
2) Anoint Your “Core 4”:

Reach out to your Core 4 people and let them know you’re starting a group with a cool new (awesome, amazing, etc.) app called Reunacy. Ask them if they have a good photo and short bio handy (i.e. on social media or LinkedIn). If they don’t, ask them to create one. If they drag their feet, don’t push it – just move them from your Core to your next tier of potential invitees. Once you have your Core 4 on board, let them know you’ll be contacting them soon to join!
3) Create Your Group!
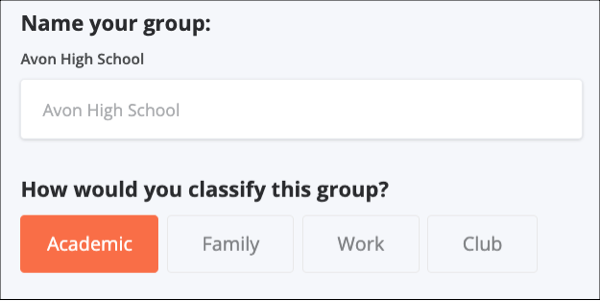
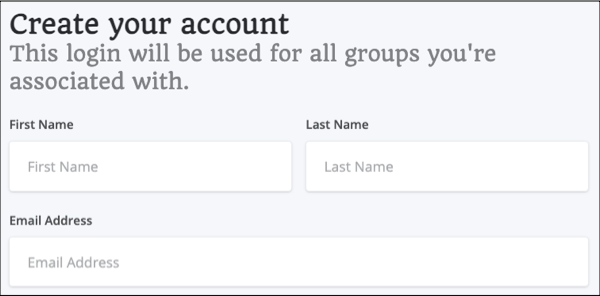
Go to reunacy.com and hit start your group. You’ll need to fill in the info about your group and set up your individual profile. By starting the group, you automatically become the admin. We can help you add other admins if needed; just reach out to us here.
4) Start Inviting!

Once your group page is set, use the Invite Friends button to invite your Core 4. Ask them to follow the sign-up instructions and fill out their profile pages as completely as possible. And now that you have a strong foundation, you can also ask your Core 4 to invite more classmates to the group, too!
Now, if you really want to take things up a notch, we have some ULTRA Exclusive Advanced User Tips as well.
How To Jumpstart Your Group with Placeholder Profiles

If you want to be a real hero and go the extra mile, you can actually set up Placeholder Profiles for your Core 4 by following the steps below.
NOTE: this is only recommended for people you know really well and will welcome an extra level of assistance.
Here’s a step-by-step guide to create Placeholder Profiles for new members:
1) Before You Start:
Get the following info for each profile you plan to create:
- The person’s full name
- Their current email address
- A very simple, temporary 8-character password
Other optional info includes:
- Photo/Headshot
- Current city of residence
- Alma Mater
- Occupation
- Short Bio
- Maiden name (if applicable)
Pro Tip: Be mindful of how much content you pre-bake into a Placeholder Profile. The idea is to strike a balance between making it easier for someone to join and respecting their privacy. We recommend sticking to just a few of the items above.
2) Get Started:
Once you’re ready to go, follow these steps:
- Log in to Reunacy and go to your new group page.
- Go to the Members view.
- Click the “Invite Friends” button
- Copy the invite URL link
- Log out
3) Go To Your Group Page:
Copy the invite link into your browser. The group page will open and you should see a message like this:

NOTE: If you don’t see this message, you may still be logged in. Log out and try again.
4) Create Your Placeholder Profile:
Click “Create Your Profile” and fill in the name, email, and temp password for the Placeholder Profile you are starting and click Create Account. On the next page, add whatever info you can, then scroll to the bottom and click Finish. You should be redirected to the Member page where you’ll see your new Placeholder Profile added.
5) Log out and repeat starting at Step 3 to create your next profile.
You can repeat the above steps as many times as you need – just make sure you log out each time you start a new one.
Pro Tip: To speed up the process of adding new members to your group, it can be handy to have two different browsers open simultaneously. That way you can log in as yourself (the group admin) in one, and create new member profiles in the other. For example, if you log in as yourself in Chrome, you could open Safari or Explorer to create new profiles. This will let you track your progress on your group page in Chrome as you add new profiles.
Invite Folks to Claim Their Profiles

1) Reach Out:
You can now reach out to everyone and tell them about their profiles. You should email them the following info:
- A link to your members page (just copy the URL from your browser while logged in).
- The email and temporary password you used
- The password reset link: https://app.reunacy.com/forgot-password
You can write your own email or use the template provided below.
2) Kick Back And Relax:
Enjoy a cool drink, and wait for your group to start filling out their profiles!
3) Review Their Work:
As your Core members populate their profiles, review them to make sure everything looks good (and appropriate). Note that as the admin you can make minor adjustments to a member’s profile if needed. We don’t encourage doing this often, but having a page and profiles that look good will inspire new invitees to join and follow the examples of you and your Core 4.
4) Reap The Rewards:
Once your Core 4 has joined you page will look so much more welcoming to new folks! Seeing that initial group of familiar faces is the single biggest incentive for others to join.
Now you can use the Invite Friends button to invite an even larger number of people to join!
You can invite people by copying and pasting emails into the app or you can copy the invite link into an email or text message you send from your email or phone – whatever works for you.
You can also post/share the invite link to social media; just know that anyone who has the link can join the group, so you will want to be somewhat protective of it. Remember, that as the admin, you can always remove any members who join by mistake or who simply don’t belong in the group.
Once you’ve got a good critical mass, you can use the page to send updates to members via email, send out new prompts for video messages, export class lists as spreadsheets, and update event information via the group page.
Lastly, remember that much like a reunion, it’s unlikely that 100% of your people will participate. But those who do will have a great time catching up with everyone.
Enjoy and contact us with any questions at https://reunacy.com/contact/